Table of Contents
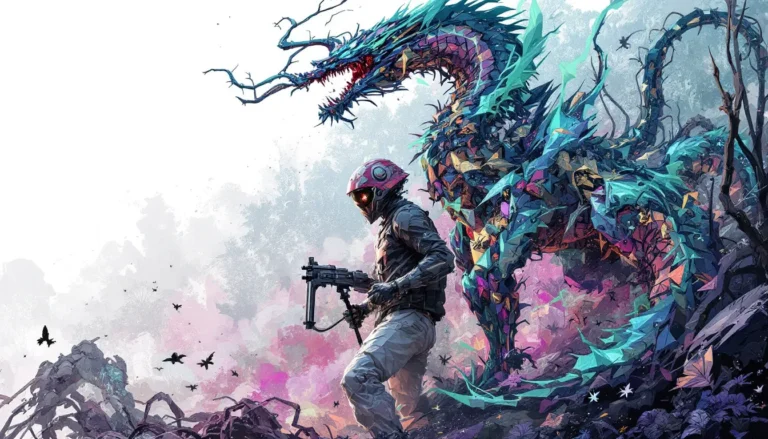
ToggleKinich burst onto Genshin Impact as one of Natlan’s most dynamic DPS characters, and if you’ve been sleeping on the jaguar warrior, it’s time to pay attention. This Dendro claymore user combines aggressive melee damage with unique mechanics that reward skilled positioning and elemental synergy. Whether you’re pushing Spiral Abyss or exploring the sprawling regions of Natlan, Kinich brings the kind of versatility that makes him feel like a worthwhile investment. In this guide, we’ll break down everything you need to know: optimal builds, artifact strategies, team compositions, and combat tactics that’ll transform him from a solid character into a damage-dealing machine. Let’s get into it.
Key Takeaways
- Kinich is a physical-leaning Dendro claymore DPS that demands on-field time and rewards skilled positioning with sustained damage output.
- Optimize Kinich’s build with 60-70% Crit Rate, 120%+ Crit Damage, and prioritize artifacts like Gilded Dreams (4-piece) for reaction-heavy teams or Gladiator’s Finale combinations for pure ATK scaling.
- Pair Kinich with off-field applicators such as Fischl for Aggravate teams or Yelan for Bloom teams to maximize elemental reaction synergy without competing for field time.
- Talent investment hierarchy focuses on Normal Attack (primary damage source), Elemental Skill (Dendro application), then Elemental Burst, with crowning Normal Attack as the highest priority.
- In Spiral Abyss, Kinich excels in sustained DPS chambers with single or paired enemies, offering reliable consistency and flexibility across multiple team compositions despite lacking the one-shot burst potential of nuke-focused characters.
Who Is Kinich? Character Overview and Role
Kinich’s Vision and Elemental Role
Kinich wields a Dendro Vision and fights with a claymore, positioning him as a physical-leaning Dendro main DPS. His kit revolves around dealing consistent damage while triggering Dendro reactions when paired with pyro or electro supports. Unlike some Dendro characters that excel at off-field damage, Kinich demands field time, he’s the one swinging the weapon, not the one triggering reactions from the sidelines.
His Normal Attack chain is tight and hits hard, while his Elemental Skill (Ks) grants him increased damage and applies Dendro to himself and enemies. The real standout is his Elemental Burst, which shifts his playstyle into a more aggressive, high-damage window. Think of him as a character who rewards you for staying active and engaged in combat.
Kinich excels in sustained damage situations where you can lock onto enemies and let his attacks work. He doesn’t have the crowd control of some characters, but he makes up for it with raw DPS output and flexibility in team building.
Story Significance in Natlan
Story-wise, Kinich is deeply woven into Natlan’s narrative as one of the region’s prominent figures. His character design and abilities reflect Natlan’s jungle aesthetic and warrior culture. Without diving into spoilers, his presence in quests gives context to why he fights the way he does and what drives his combat style.
For players experiencing Natlan’s archon quest and world exploration, understanding Kinich’s role in the story adds depth to why he’s framed as such a capable fighter. His story quests (available post-release) provide additional lore about his background and motivations, which is worth experiencing for the full picture of his character.
Best Builds for Kinich: Main DPS and Support Strategies
Main DPS Build Recommendations
As a main DPS, Kinich thrives with a focus on ATK, Crit Rate, and Crit Damage. Your goal is to maximize his normal attack and skill damage while keeping his crit ratio balanced (aim for 60-70% Crit Rate, 120%+ Crit Damage as a baseline).
Primary Stats to prioritize:
- Main DPS ATK-focused: ATK% sands, Dendro Damage Bonus goblet, Crit Rate or Crit Damage circlet (depending on your ratio)
- Alternative Hybrid Build: Consider Elemental Mastery on sands if you’re heavily relying on Dendro reactions (Bloom, Aggravate), as this scales both damage and reaction output
- Burst Priority: Since his burst is damage-heavy, Energy Recharge becomes relevant, aim for 120-140% ER from substats if your weapon doesn’t provide it
The beauty of Kinich’s kit is flexibility. If you’re running him in aggravate (Dendro + Electro) teams, Elemental Mastery scales harder. In pure physical carries or mono-Dendro setups, stick with traditional ATK/Crit builds. Tier lists and build breakdowns on gaming sites often rank Kinich’s DPS potential in the upper tiers when properly built, and that’s justified by his consistent damage output.
Support and Sub-DPS Builds
If you’re using Kinich as an off-field support or sub-DPS (situationally useful in some team comps), shift your priorities:
- Off-Field Dendro Application: Focus on Elemental Mastery and Dendro Damage, with less emphasis on Crit. Your skill cooldown determines uptime, so Energy Recharge becomes less critical unless you’re bursting frequently
- Hybrid Support-DPS: This is where Kinich shines in flexibility. A balanced build with decent ATK%, Crit, and Elemental Mastery lets him function as both a solid damage dealer and reaction trigger. This is especially useful in teams where you rotate characters frequently
Honestly, Kinich’s kit discourages pure support roles. He’s at his best when the player invests in making him hit hard, not just enabling others. If you’re thinking about using him as support, you might be better served by dedicated Dendro applicators like Baizhu or Nahida depending on your team needs.
Artifact Sets and Stat Priorities for Optimal Damage
Top Artifact Combinations
Artifact selection can make or break your Kinich build. Here are the most effective combinations:
For Maximum DPS (ATK/Crit focused):
- Gilded Dreams (2) + Gladiator’s Finale (2): This is the go-to for ATK-scaling. Gilded Dreams gives 80 EM and 18% ATK when you have Dendro teammates, while Gladiator adds 18% ATK. Simple, effective, and widely available.
- Deepwood Memories (4-piece): If you’re running Kinich as your primary Dendro applicator in a non-reaction-heavy team, full Deepwood reduces enemy Dendro resistance by 30%, boosting your overall team damage. This is especially useful in Spiral Abyss where you control both sides.
For Reaction-Heavy Teams (Dendro + Electro/Pyro):
- Gilded Dreams (4-piece): The full set gives 80 EM base plus an additional 25% ATK when you have different elemental types on the field. In aggravate or bloom teams, this quickly becomes your highest damage option.
- Deepwood Memories (2) + Gladiator’s Finale (2): A balanced hybrid that provides both Dendro application support and personal ATK scaling.
For Elemental Mastery Builds:
- Gilded Dreams (4-piece): Since it scales with EM directly, you’re looking at 80 EM + 18% ATK baseline, then 25% extra ATK for each different element on your team. In a four-element team, that’s massive ATK scaling on top of the EM benefits.
The difference between a well-built artifact set and a mediocre one is honestly 20-30% damage output. Farming Gilded Dreams (available in the Dendro domain) is worth the grind early on.
Critical Stats and Main Stat Allocation
This is where player discipline matters. Here’s the hierarchy of what to farm:
Priority Order:
- Crit Rate & Crit Damage: Aim for a 1:2 ratio (e.g., 70% Crit Rate with 140% Crit Damage). A circlet with your preferred crit stat is mandatory. Don’t sleep on Crit Rate substats, they’re harder to find than Crit Damage.
- ATK: Second priority. ATK% sands plus weapon ATK bases you around 2000+ ATK for decent scaling. High ATK makes your multipliers hurt.
- Elemental Mastery: Third priority if you’re in reaction teams. 100-200 EM is a noticeable bump: 300+ EM becomes significant for Bloom or Aggravate setups.
- Energy Recharge: Fourth priority. Only prioritize if you’re bursting frequently (180%+ ER is overkill: aim for 120-140% if your weapon doesn’t provide it).
Substat Priority:
When farming artifacts, prioritize rolls into: Crit Rate > Crit Damage > ATK% > EM > ER. If an artifact has Crit Rate, Crit Damage, and ATK% as its first three rolls, keep it, that’s the kind of rng-blessed piece that makes builds sing.
One pro tip: don’t farm artifacts at the expense of weapon ascension and talent books. A well-leveled Kinich with mediocre artifacts outperforms a poorly leveled Kinich with perfect artifacts. Balanced investment wins.
Weapon Selection: Claymore Choices for Kinich
5-Star Claymore Weapons
Weapon choice dramatically impacts Kinich’s ceiling. The 5-star options are worth discussing:
Redhorn Stonethresher: Geo-scaling weapon that provides ATK% and increased normal/charged attack damage. While Kinich is Dendro, not Geo, this weapon’s raw stats make it universally strong for any ATK-scaling claymore user. The passive scales with DEF, which Kinich doesn’t have, so you’re getting pure stat value without passive synergy, still worth it.
Song of Broken Pines: An ATK-scaling weapon with movement speed and attack speed. If your Kinich feels sluggish, this weapon makes his attack animations snappier and opens up more fluid combos. The ATK buff is conditional, but in extended fights it’s reliably active.
The Bell: A defensive-leaning 5-star that doesn’t suit Kinich’s playstyle. Skip unless you’re desperate for survivability.
Legendary Claymores (Limited Banners): Any future Dendro-exclusive claymores will likely outclass these options, so watch for reruns and new releases. As of now, Redhorn and Song of Broken Pines are your best bets if you have them.
If you don’t have a 5-star, don’t panic, there are solid 4-star options that close the gap significantly.
F2P-Friendly Claymore Alternatives
Free-to-play players have legitimate options that won’t gut Kinich’s damage:
Prototype Archaic: Craftable, ATK-scaling, with a damage proc on normal attacks. This is the classic F2P DPS claymore. It’s not flashy, but it works. Ascension materials are readily available from the blacksmith.
Whiteblind: Craftable DEF-scaling weapon that boosts ATK% based on DEF. Kinich doesn’t gain defensive benefits from having DEF, but the passive’s ATK% scaling is still useful. Less optimal than Prototype Archaic for pure damage.
Rainslasher: A craftable Electro-scaling claymore. Kinich benefits from the ATK% base, and if you’re running him in electro-reaction teams (aggravate), the Elemental Damage bonus is relevant. Niche but viable.
Debate Club: A 3-star weapon that’s honestly better than you’d think for early-game Kinich. The ATK% scaling is low, but the passive proc on normal attacks provides a damage floor that carries you through overworld and early domains.
Farming Strategy: If you don’t have a 5-star and can’t pull one, Prototype Archaic is your target. Farm the Blacksmith materials (ore and crystal chunks are abundant), refine it if possible, and you’ve got a weapon that scales with Kinich’s build direction. By the time you get a 5-star, you’ll already be clearing hard content.
Weapon damage matters, but it’s not insurmountable. A properly built Kinich with Prototype Archaic outdamages a neglected Kinich with Redhorn any day.
Team Composition and Synergies
Elemental Reaction Teams
Kinich’s real power emerges when you build teams around his Dendro application. He’s not a “plug and play” character, team composition matters.
Aggravate Teams (Dendro + Electro):
Pair Kinich with a strong electro applicator like Fischl (off-field lightning), Raiden Shogun (burst-focused), or Nahida (if you want off-field Dendro instead, though she’s usually a main DPS herself). Aggravate scales with both Elemental Mastery and ATK, so your standard Kinich build synergizes perfectly. The electro character applies frequent electro on enemies, triggering Aggravate every time Kinich attacks. This is one of Kinich’s best team archetypes.
Example Aggravate Team: Kinich (main DPS) + Fischl (electro applicator) + Dendro support (Baizhu or Nahida) + Flex (healer like Kokomi or Bennett).
Bloom Teams (Dendro + Hydro):
Hydro applicators like Yelan, Xingqiu, or Kokomi pair with Kinich to trigger Bloom reactions. Bloom scales with Elemental Mastery but doesn’t add direct personal damage to Kinich, it’s more about area denial and damage in clustered fights. The downside? Bloom creates floating seeds that you need to pop manually or with AoE. In controlled Spiral Abyss fights, Bloom is strong: in overworld exploration, it’s less elegant.
Example Bloom Team: Kinich (main DPS) + Yelan (off-field hydro) + Dendro support + Flex.
Pure Physical/Mono-Dendro:
If you ignore reactions entirely and focus on raw Kinich damage, pair him with Dendro supporters who don’t trigger reactions, think Baizhu for healing and off-field Dendro, or Nahida for EM sharing if her skills are enough for the fight. Add a flex healer or utility unit. This isn’t the “meta” approach, but it works if you want simplicity and pure personal damage.
Best Support Characters for Kinich
Not all supports are equal. Here’s who genuinely elevates Kinich’s performance:
Top-Tier Supports:
- Fischl (Electro): Off-field electro application via Oz transforms Kinich into an Aggravate machine. Her A4 ascension passive boosts off-field electro damage, making her one of the most efficient supports Kinich can ask for.
- Baizhu (Dendro): Provides off-field Dendro application via his skill, plus healing. His ascension boosts team EM by 60, directly buffing Kinich’s reaction damage. Best pure support option if you don’t need pyro.
- Nahida (Dendro): If you’re using her instead of running Kinich as main DPS, her off-field Dendro application is unmatched. As a sub-DPS, she also boosts team EM significantly via passive. This is a premium pairing.
- Yelan (Hydro): Off-field hydro application with incredible personal damage. She scales with ATK and EM, so she benefits from the same stats your team is building. Pairs well with Kinich in Bloom setups and acts as a secondary DPS.
Healing & Utility:
- Kokomi (Hydro): Heals, applies off-field hydro via her jellyfish, and shares EM via ascension. A Swiss Army knife that enables Bloom while keeping your team alive.
- Bennett (Pyro): ATK buff plus off-field pyro application. If you’re running Kinich in pyro-based teams, Bennett enables Burgeon reactions (Dendro + Pyro + Hydro) while buffing ATK for all party members. His ATK boost is massive for Kinich’s damage.
Team building in Genshin is a balance between reaction amplification and character utility. Kinich works in multiple frameworks, but his best teams pair him with off-field applicators so he can focus on dealing damage without field time competition.
Talents, Constellations, and Ascension Guide
Priority Talent Leveling
Talent investment is where you turn a mid Kinich into a powerhouse. Here’s the priority order:
Talent Level-Up Hierarchy:
- Normal Attack: Your bread and butter. This is Kinich’s primary damage source. Level this to 9 or 10 (crown if you have the material). Every single auto attack scales with this talent, so returns on investment are consistent and high.
- Elemental Skill (E): Second priority. This applies Dendro and boosts damage. The cooldown and damage scaling make it worth maxing out. Aim for level 8-9.
- Elemental Burst (Q): Third priority, but still important. The burst damage is respectable and it resets skill cooldowns in some cases. Level 8 is acceptable if you’re resource-strapped.
Why This Order?
Kinich doesn’t have off-field damage, so every multiplier directly benefits you. Normal attack scaling has the highest uptime: you’re literally attacking with it every few seconds. Skills have longer cooldowns, so the multiplicative benefit is smaller per second, but the burst window is important for damage spikes.
If you crown a talent, crown Normal Attack. If you have a second crown, Normal Attack again (you can’t actually crown it twice, but that shows the priority). Elemental Skill gets the second crown typically.
Constellation Breakdown and Power Spikes
Constellations are the deluxe tier of Kinich investment. Here’s what matters:
C0 (Base Kit): Fully functional. Kinich’s base kit is complete and competitive without constellations.
C1: Adds another charge to his skill. More skill usage = more Dendro application and potential for higher damage windows. Modest improvement.
C2: Increases burst damage scaling. Noticeable bump when you burst, but not a game-changer without other constellation synergy.
C3 & C5: Talent level-up passives. Raise Normal Attack and Elemental Skill ceilings. Useful but expensive relative to the damage gained.
C4: Constellation effects vary depending on Kinich’s specific kit. Check the exact phrasing in-game, as this is where constellation power often spikes differently for different characters.
C6: The ultimate constellation typically unlocks extended damage windows or passive boosts. This is where “C6 Kinich players” become noticeably more powerful.
Practical Take: If you’re F2P, don’t worry about constellations. C0 Kinich with good artifacts and weapon beats C2 Kinich with mediocre investment. Whales pulling for constellations will see improvement, but it’s not a “can’t clear content without it” situation.
Ascension Priority:
Ascend Kinich to Level 90 if possible. The ATK scaling is high, and hitting level 90 on a main DPS is standard practice. If resources are tight, Level 80 is the minimum for competitive damage, but 90 is worth the grind eventually. Ascension materials are farmable from Dendro domains and Natlan-specific enemy drops.
Combat Tips and Rotation Strategies
Skill Rotation for Maximum Damage Output
This is where Kinich separates good players from great players. Combat isn’t just about having good stats: it’s about execution.
Basic Rotation (3-4 second loop):
- Use Elemental Skill (Dendro apply + damage boost)
- Chain Normal Attacks (leverage the damage buff from skill)
- Burst when available (extended damage window)
- Repeat
The goal is keeping Kinich’s Dendro application on enemies while maintaining your damage buff uptime from the skill. If your skill has a cooldown of 6 seconds and your buff lasts 5 seconds, you should be refreshing it right as the buff fades.
Elemental Reaction Rotation (Aggravate):
- Use Elemental Skill
- Switch to Fischl, trigger Oz or use her burst for off-field electro
- Switch back to Kinich
- Chain Normal Attacks, each hit triggers Aggravate when Fischl’s electro is active
- Burst on cooldown for damage spike
- Repeat
The key insight: you’re not managing Fischl’s uptime: she’s managing herself off-field. Your job is staying on Kinich to farm Aggravates. This is why Fischl is his best electro partner, you literally just turn her on and forget about her.
Elemental Reaction Rotation (Bloom):
- Use Elemental Skill
- Switch to Yelan, apply off-field hydro
- Switch back to Kinich
- Normal Attacks trigger Dendro+Hydro reactions = Bloom seeds
- Burst or use area abilities to detonate seeds (Kokomi jellyfish, other area damage)
- Repeat
Bloom is more timing-dependent because you need to detonate seeds. If enemies are spread out, this becomes clunky. In clustered fights (Spiral Abyss), Bloom shines.
Energy Management:
Watch Kinich’s energy bar. If you’re using his burst on cooldown, you need 120-140% ER minimum. If you’re bursting every 2-3 rotations instead, you can run lower ER and invest those stats elsewhere. Know your own playstyle, rushing burst every time versus banking it for specific moments changes your build priorities.
Positioning and Movement Mechanics
Physically where you stand matters in Genshin Impact, especially for a melee DPS like Kinich.
Positioning for Safety:
- Stay at medium range from enemies, close enough to hit with claymore, far enough to see incoming attacks. Bosses telegraph their moves: learn the tells and dodge preemptively.
- Use terrain to your advantage. Pillars, walls, and height differences can block enemy projectiles or melee attacks.
- Group enemies close together if possible. Claymores hit multiple enemies in an arc, so stacked enemies = efficient DPS.
Movement During Rotations:
- Stamina management is real. Dodging costs stamina: so does sprinting. Don’t waste it on panic rolls. Learn to predict attacks and dodge early.
- Jump attacks and charged attacks can be useful for repositioning or dealing extra damage, but they’re stamina-costly. Factor them into your energy and cooldown timings.
- If you’re running Kinich in Spiral Abyss, the arena design often forces you to reposition. Practice pathfinding that doesn’t interrupt your rotation.
Advanced Technique: Canceling Animations
Kinich’s claymore swings have animations that lock you in place. Experienced players cancel these animations with a dash or jump at the right timing to maintain DPS while repositioning. This is optional, it’s a skill cap thing, but learning it adds to your ceiling.
Against Specific Enemy Types:
- Flying Enemies: Harder for melee DPS. Use bursts and area abilities to knock them down, then close in. Fischl’s Oz can apply electro to grounded flying enemies, helping Aggravate setups.
- Shielded Enemies: Kinich’s Dendro can trigger breaks on certain shields (pyro shields need hydro, cryo shields need pyro, etc.). Plan your team composition around shield breaking if it’s relevant.
- Clustered Enemies: Kinich’s claymore hits multiple targets. This is where he shines. Aggravate and Bloom both scale with enemy count in different ways, more enemies = more damage opportunities.
Combat mastery in Genshin is mechanics + team synergy + stat optimization. Kinich rewards all three.
Kinich in the Abyss and Spiral Abyss Viability
Recommended Abyss Lineups and Enemies
Spiral Abyss is the endgame DPS check. Kinich’s performance here depends on the chamber lineup and enemy types.
Ideal Abyss Matchups for Kinich:
- Dendro-Heavy Chambers: If the enemies have dendro weaknesses or if Aggravate/Bloom reactions are relevant, Kinich shines. He’s better than characters who suffer from dendro resistance.
- Single/Pair Boss Fights: Kinich can lock onto a few enemies and deal sustained damage. Chambers with one or two tough bosses often favor single-target DPS.
- Chambers Without Elemental Locks: Some abyss cycles restrict specific elements (e.g., “electro characters deal 50% less damage”). Kinich as a dendro DPS isn’t usually affected by these restrictions, making him flexible.
Weaker Matchups for Kinich:
- Spread-Out Enemies: Claymores have limited range. If enemies are scattered across the arena, you’re running between groups inefficiently. Ranged DPS like bow users or catalyst users are better here.
- Extreme Time Constraints: If a chamber has a very short timer and requires burst damage, Kinich’s sustained approach might not meet the DPS check. Nuker-focused teams (one-shot builds) handle these better.
- Healer-Immune Chambers: Occasionally, abyss floors restrict healing. Kinich doesn’t provide personal survivability, so these chambers become tactical challenges rather than DPS challenges.
Team Suggestions for Abyss:
- Side A (Kinich Main DPS): Kinich + Fischl (electro) + Baizhu (healing) + Flex (shield provider or off-field damage)
- Side B (Reaction Amplification): Kinich + Yelan (hydro) + Kokomi (healer) + Bennett (ATK buff) for a Dendro-heavy reaction team
The flexibility of Kinich means he fits into multiple abyss comps depending on the cycle. Check the current abyss lineup when it resets and adjust your team accordingly. Recent abyss guides and floor strategies sometimes feature character-specific recommendations: these are worth checking for the current rotation.
DPS Benchmarks:
Kinich’s theoretical damage ceiling puts him in the upper tier for sustained DPS. A well-built Kinich (Level 90, Level 9+ talents, 4-piece artifacts, 5-star weapon) clears most abyss chambers with 30-40 seconds remaining. This isn’t “one-shot everything” territory, but it’s “efficient enough to triple-star” territory.
The real advantage Kinich has is consistency. He deals constant, reliable damage that doesn’t require complex setups or perfect RNG. This makes him less flashy than some nuke-focused DPS but more reliable for scoring stars.
Team Flexibility in Abyss:
Unlike some DPS characters that need very specific teammates, Kinich functions in multiple team archetypes. If your usual team gets hit by elemental restrictions, you can swap supports and still run Kinich effectively. This flexibility is underrated for long-term abyss sustainability.
Conclusion
Kinich is a character that rewards investment and understanding. He’s not flashy enough to make highlight reels, but he’s consistent enough to carry you through whatever Genshin Impact throws at you, whether it’s exploration, domains, or Spiral Abyss.
The core takeaway: build him with ATK and Crit, pair him with off-field applicators (Fischl for Aggravate, Yelan for Bloom), and let his sustained DPS do the work. His playstyle is straightforward once you understand his rotation, and his flexibility across team compositions makes him a safe long-term investment.
If you’re on the fence about pulling or building Kinich, he’s worth your resources. He won’t trivialize content the way a freshly-buffed meta DPS might, but he’ll consistently contribute solid damage without demanding perfect execution or exclusive teammates. In a game where character lineups matter, that reliability matters more than you’d think. Now get out there and start farming those artifacts.