Table of Contents
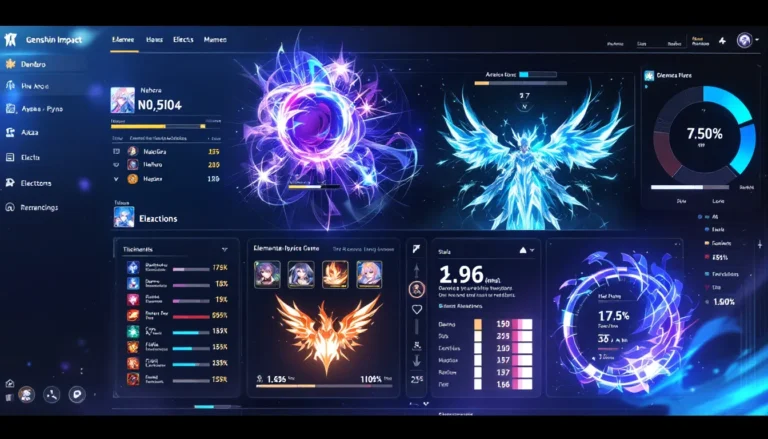
ToggleAlhaitham has solidified his position as one of Genshin Impact’s most versatile and powerful DPS characters since his release in 3.0, and his relevance hasn’t wavered heading into 2026. Whether you’re tackling the Spiral Abyss or exploring Teyvat’s toughest domains, understanding how to build and play this Dendro sword user can mean the difference between clearing content in seconds or struggling through extended rotations. His kit rewards precision and knowledge, much like the Scribe himself, and that’s exactly why so many players keep him on their main teams years after his debut. This guide covers everything from weapon selection to team synergies, artifact priorities, and the gameplay mechanics that separate casual Alhaitham players from those who unlock his true potential.
Key Takeaways
- Alhaitham remains one of Genshin Impact’s most versatile primary DPS characters in 2026, excelling across reaction-heavy and scaling-focused teams without requiring specific teammates.
- Prioritize Gilded Dreams as your artifact set, targeting 70-80% Elemental Damage Bonus, 40-50% Crit Rate, and 80-150% Crit Damage for optimal scaling.
- Level Alhaitham’s Normal Attack to 9-10 and Elemental Skill to 8 as your top priorities, as these talents directly enhance his core Chisel-Light damage mechanics.
- Maximize your Charged Attack uptime through proper rotation optimization (3-5 Normal Attacks between Charged Attacks) to unlock his true damage potential.
- Choose Primordial Jade Cutter for raw damage or Mistsplitter Reforged for smoother rotations, with Iron Sting as a viable free-to-play alternative for Elemental Mastery-focused teams.
Who Is Alhaitham and Why He Matters
Character Overview and Role
Alhaitham is a 5-star Dendro sword user who operates as a primary DPS character with exceptional scaling and flexibility. His kit centers around his Chisel-Light mechanic, which generates stacks during his Elemental Skill that enhance both his Normal Attacks and Charged Attacks with Dendro infusion. What makes him particularly strong is that unlike many DPS units, he doesn’t require specific teammates to function, he can adapt to nearly any team composition.
His role is straightforward: he’s your main damage dealer. Unlike sub-DPS characters that cycle in and out, Alhaitham thrives on field time. He generates his own Dendro application, scales directly from his Elemental Damage Bonus, and his consistent application makes him a reliable trigger for Dendro reactions throughout an entire rotation.
Dendro Vision and Elemental Significance
Alhaitham wields a Dendro Vision, which granted him access to Genshin Impact’s newest element when Sumeru launched in version 3.0. Dendro is particularly valuable because it interacts with Hydro, Electro, and Pyro to create potent reactions, Bloom, Hyperbloom, and Burgeon respectively. Among these, Bloom stands out as the foundation for Alhaitham’s core reaction strategy.
The significance of his Dendro application lies in its consistency. He applies Dendro in rapid succession without relying on teammates to trigger reactions, meaning he functions equally well in a mono-Dendro team focused on raw damage or in a reaction-heavy composition. This flexibility is why he remains relevant in 2026: the meta shifts, but consistent Dendro application never falls out of favor.
Best Build for Alhaitham: Weapons and Artifacts
Recommended Weapons
Primordial Jade Cutter is Alhaitham’s signature weapon and stands as his absolute best-in-slot option. It provides Crit Rate and a sizable Elemental Damage Bonus that stacks with his already high scaling. The passive Crit Damage boost makes it mathematically superior to any free-to-play alternative. If you own it, use it without hesitation.
But, Primordial Jade Cutter isn’t accessible to everyone. Mistsplitter Reforged is an excellent substitute that provides Crit Damage and Elemental Damage Bonus stacking. While it doesn’t match his signature weapon’s raw power, the energy efficiency it grants makes rotations smoother.
For 4-star options, Iron Sting is the standout free-to-play choice. It boosts Elemental Damage and grants Elemental Mastery stacks, which help when he’s triggering Dendro reactions. Sword of Narzissenkreuz and Blackcliff Longsword are solid alternatives if Iron Sting isn’t available. The weapon hierarchy depends heavily on your current Crit stats, if you’re overcapping Crit Rate, a weapon with Crit Damage becomes more valuable than one with raw Crit Rate.
Optimal Artifact Sets
Gilded Dreams is the consensus best set for Alhaitham in 2026. A 4-piece set grants stacking Elemental Damage Bonus and Elemental Mastery whenever nearby party members trigger Dendro reactions. It’s tailor-made for his kit and provides scaling that feels notably smoother than alternatives.
If you don’t have quality Gilded Dreams pieces, Deepwood Memories serves as a respectable second choice. The 2-piece bonus grants Dendro Damage, and the 4-piece debuffs enemy Dendro resistance, making it valuable for team scenarios where Alhaitham isn’t the sole Dendro applicator.
A 2-piece Gilded Dreams + 2-piece Deepwood Memories hybrid build is also viable, especially if your artifact RNG has been cruel. You get Elemental Mastery stacking and enemy resistance debuffs without committing fully to either set.
Stat Priorities and Substats
Your artifact substats should follow this priority hierarchy:
- Elemental Damage Bonus (60-80% total) – This is your primary scaling stat. Aim for roughly 70-80% when combining artifact main stats and weapon bonuses.
- Crit Rate (40-50%) – Use the 1:2 Crit Rate to Crit Damage ratio as a guideline. Crit Rate should cap around 40-50% to minimize overkill.
- Crit Damage (80-150%) – Multiply your Crit Rate by 2 to find your target. With Primordial Jade Cutter’s passive, you’ll likely exceed 150% naturally.
- Elemental Mastery (100-200 EM) – Secondary stat with Gilded Dreams. Helps with reaction damage if you’re running him in a reaction-focused team.
- ATK % – Only if you’re struggling to reach EM or Elemental Damage minimums. Alhaitham’s ATK scaling is respectable but not his primary damage source.
- Energy Recharge (120-140% ER) – Only necessary if you’re using him in a team where he won’t be on-field constantly. Most builds can ignore ER entirely if rotations are optimized.
Avoid flat ATK, Def %, and HP % as priority substats. Elemental Damage Bonus and Crit stats reign supreme.
Team Compositions and Synergies
Support Characters and Reactions
Alhaitham’s greatest strength is his adaptability. Unlike characters locked into one team archetype, he functions across multiple compositions with varying support casts.
Hydro-focused teams pair Alhaitham with Yelan or Kokomi to trigger Bloom reactions. Bloom creates Dendro cores that deal area damage and activate at a set interval, providing consistent off-field damage. Yelan is the premium choice if you own her, her damage buffing passive and off-field Hydro application synergize perfectly. Kokomi offers healing instead, making the team more forgiving in harder content.
Electro synergy leverages Fischl or Raiden Shogun to trigger Hyperbloom. Hyperbloom converts Bloom cores into bouncing projectiles with significantly higher damage per core. Fischl’s off-field Electro damage rivals main DPS contributions, making this arguably the highest damage ceiling composition. Raiden Shogun’s burst battery function helps with team energy if you’re using high-energy-cost supports.
Mono-Dendro or pure scaling compositions use Kazuha or Nahida for Elemental Damage Bonus buffing. Kazuha is particularly strong here, his passive grants significant Elemental Damage buffs, and his Elemental Mastery scaling makes Dendro reactions hit harder. Nahida provides Dendro application and Crit Damage buffs, functioning as an enabler rather than pure support.
The best Genshin Impact characters and teams cover additional composition options based on your roster depth.
Elemental Reaction Strategies
Understanding which reaction to prioritize depends on your team’s Hydro and Electro availability.
Bloom-focused teams maximize damage by stacking multiple Hydro applicators. More Hydro application means more Dendro cores, and more cores mean more damage windows. This setup doesn’t require Elemental Mastery investment beyond what artifacts naturally provide, the reaction activates based on application priority.
Hyperbloom teams demand higher Elemental Mastery on your Electro applicator (aim for 200+ EM on Fischl specifically). Hyperbloom’s damage scales directly with EM, so investing into your Electro support becomes as important as investing into Alhaitham himself.
Burgeon teams with Pyro applicators are viable but rarely optimal. Burgeon’s damage ceiling is lower than Bloom and Hyperbloom, and Pyro’s limited off-field applicators make the composition feel clunky.
The reaction strategy you choose should match your roster. If you lack both Hydro and Electro supports, a mono-Dendro scaling approach works perfectly fine. Genshin Impact Techniques: Essential Combat and Exploration Skills can help you master the mechanical execution of these reactions once you’ve settled on a composition.
Talent Priorities and Leveling Guide
Prioritize Alhaitham’s talents in this order: Normal Attack > Elemental Skill > Elemental Burst.
His Normal Attack scaling forms the backbone of his damage output. Since his Chisel-Light mechanic directly enhances Normal and Charged Attacks, leveling this talent to 9 or 10 is non-negotiable. Every level here translates to direct DPS increases.
The Elemental Skill is your second priority. It generates Chisel-Light stacks, provides initial Dendro application, and scales reasonably well. Push this to at least level 8. The difference between level 8 and 10 exists, but it’s less dramatic than Normal Attack scaling gaps.
The Elemental Burst has the weakest scaling relative to its costs. While it provides crowd control and an additional damage window, it’s not essential for rotations and can be left at level 6 without severely impacting your DPS ceiling. That said, if you’re using him in a team where burst uptime matters (like with Raiden Shogun), leveling it to 8-9 becomes worthwhile.
Leveling progression:
- Priority 1: Get Normal Attack to 9/10 and Elemental Skill to 8 minimum before farming other talents aggressively.
- Priority 2: Elemental Burst to 8 if you’re running him in reaction-heavy teams that benefit from burst cycling.
- Priority 3: His passive talents don’t require leveling but provide subtle bonuses, Chisel-Light decay delay and Normal Attack damage stacking bonuses.
Farm Talent books from Spantamad (Mondays, Thursdays, Sundays) if you’re in Asia/Americas server, or from equivalent domains in your region. Plan ahead: upgrading all three talents from 6→9 requires approximately 60 Talent books, so spacing out your farming prevents burnout.
Alhaitham’s talent level-up caps at 10 for Normal Attack and 9 for Elemental Skill/Burst unless you’ve obtained constellation dupes. Focus on reaching 9/8/6 before chasing the final levels.
Ascension and Material Farming
Alhaitham’s ascension follows the standard 5-star material path, requiring Nagadus Emerald shards, Quelled Creepers, Faded Red Silk Fabric, and Lightless Silk.
Nagadus Emerald drops from Dendro hypostasis located in the Mawtiyima Forest. Farm this boss on Sundays, Wednesdays, or Saturdays when it’s available. You’ll need approximately 46 total shards split across all ascension phases, expect roughly 8-10 farming runs to gather everything.
Quelled Creepers are Sumerian regional specialty plants found throughout Sumeru’s rainforest regions. Search near water sources and grassy areas, they respawn every 48 hours. Gathering 40 creepers requires about 20-30 minutes of methodical farming. Use interactive maps or video guides if you’re struggling to find spawn locations.
Faded Red Silk Fabric and Lightless Silk drop from Eremite enemies scattered across Sumeru’s desert regions. These come from normal enemy drops, so you’ll accumulate them passively while farming other materials or doing domain runs. If you’re specifically targeting these, farm Eremite camps in the Mausoleum region.
Leveling progression:
- Ascension 1 (level 20→40): Farm immediately, requires minimal materials.
- Ascension 2-4 (levels 40→50→60→70): Stagger farming across multiple weeks. Prioritize boss materials first, then hunt regional specialties.
- Ascension 5 (level 70→80): This is your final push before max level. You’ll need your last weekly Emerald drop, so plan accordingly.
The entire ascension chain to level 90 takes approximately 4-5 weeks of consistent farming, with Sundays being your most efficient farming days due to domain availability. Don’t neglect this progression, ascending to level 80 before farming talent books ensures your damage scales appropriately for Spiral Abyss content.
Combat Tips and Gameplay Mechanics
Weapon Choice Trade-Offs
Weapon selection directly impacts your rotation efficiency. Primordial Jade Cutter maximizes raw damage but offers no passive utility. If you’re running him in a pure scaling composition, Jade Cutter is unquestionably best, every ounce of Crit Damage and Elemental Bonus compounds your DPS.
Mistsplitter Reforged introduces passive damage stacking and provides smoother energy management. Its 4-piece passive grants stacking Elemental Damage Bonus up to three times, effectively multiplying your scaling over an extended field presence. This weapon shines in rotations where Alhaitham stays on-field for extended periods, exactly what his kit demands.
Iron Sting, even though being 4-star, remains competitive in Elemental Mastery-focused builds. If you’re running Hyperbloom compositions where EM directly scales your reaction damage, Iron Sting’s Elemental Mastery stacking can outperform premium options like Blackcliff Longsword. The trade-off is lower base ATK and reduced Crit stats, but that’s acceptable if your artifacts compensate.
Choose your weapon based on your artifact substats. If you already have excess Crit Rate from substat farming, prioritize weapons offering Crit Damage. If you’re running an EM-heavy team, Iron Sting becomes viable even though its lower rarity. Genshin Impact Strategies: Essential Tips expand on meta-shifting recommendations when new weapons release.
Positioning and Rotation Optimization
Alhaitham’s attack pattern demands specific positioning. His Charged Attacks represent his highest scaling multipliers, around 150% more damage than Normal Attacks, so your rotation should prioritize Charged Attack uptime.
Optimal rotations typically follow this structure:
- Activate Elemental Skill to generate initial Chisel-Light stacks (3 stacks).
- Perform 3-5 Normal Attacks interspersed with Charged Attacks.
- Use Elemental Burst when available for crowd control and additional damage.
- Swap to supports for healing, buffing, or reaction triggering while Elemental Skill cooldown resets.
- Return to Alhaitham when Skill is off cooldown to resume the cycle.
The exact Normal Attack count between Charged Attacks depends on your animation speed and comfort level. Newer players can perform 5 Normal Attacks between Charged Attacks without dropping frames. Veterans optimize to 3-4 Normal Attacks for maximum Charged Attack frequency.
Positioning matters less than maintaining consistent Charged Attack uptime. Place Alhaitham where enemies cluster, his Burst provides AoE knockback, which can separate enemies. Play around crowd patterns rather than forcing specific playstyles. In single-target scenarios, you have complete freedom to position aggressively since knockback becomes irrelevant.
Energy management affects rotation flow. Alhaitham’s Burst costs 80 energy, but his Skill only generates ~24 energy per activation. Without external battery support, you’ll need 2-3 Skill casts before your Burst resets. Pairing him with battery characters like Nahida (off-field Dendro battery) or Kazuha (Elemental Mastery battery) ensures consistent burst cycling.
Resource optimization means understanding energy economics: if your team generates sufficient energy through supports, you can ignore ER entirely on Alhaitham’s artifacts. If you’re running him solo-Dendro without battery support, aim for 130-140% ER to maintain reasonable uptime. Genshin Impact Trends 2026: What to Expect This Year discusses how the meta continues evolving around rotation optimization as new characters release.
Conclusion
Alhaitham remains one of Genshin Impact’s most rewarding characters to master heading into 2026. His strength comes not from brute-force scaling alone, but from his adaptability, the same kit that clears Spiral Abyss in a reaction-heavy Hyperbloom team can pivot to a scaling-focused Elemental Damage build without fundamental restructuring.
Building him effectively requires attention to detail: prioritizing Elemental Damage Bonus and Crit stats, choosing weapons that complement your rotation, and selecting supports that match your damage priority. The artifact farming grind can feel endless, but reaching 70-80% Elemental Damage Bonus with reasonable Crit stats represents a functional baseline that clears challenging content.
What separates good Alhaitham players from great ones is understanding his positioning demands and rotation optimization. Maximizing Charged Attack frequency, maintaining energy consistency through battery synergies, and adapting to enemy placement creates the difference between 30-second and 60-second Spiral Abyss clears. Resources on Genshin Impact Tools: Essential Resources and similar community sites provide real-time damage calculators and team builders if you want to min-max your specific setup.
If you’re building Alhaitham or reconsidering his role in your roster, start with the artifact set change to Gilded Dreams if you haven’t already. That single adjustment often produces more noticeable improvements than weapon swaps. From there, focus on reaching your stat targets: 70% Elemental Damage, 40-50% Crit Rate, and 100-150% Crit Damage. Master his rotation mechanics through practice, and you’ll find he rewards precision with clean damage windows that justify his 5-star investment.