Table of Contents
ToggleAyato has carved out a unique niche in Genshin Impact’s meta as one of the most versatile hydro DPS options available. Whether you’re pushing Spiral Abyss or tackling world bosses, understanding how to build and play this water swordsman can transform your account’s performance. This guide breaks down everything from his ability mechanics to team compositions and advanced combat rotations, so you can unlock his full potential and stop leaving damage on the table.
Key Takeaways
- Ayato remains one of Genshin Impact’s most versatile hydro DPS options in 2026, offering consistent damage output without requiring exotic support characters or perfect artifact rolls.
- Prioritize building Ayato with 2,000+ ATK, 60-75% Crit Rate, and 120-150% Crit Damage using either Echoes of an Offering or Heart of Depth artifact sets for optimal performance.
- Use Echoes of an Offering as your best-in-slot artifact set, paired with weapons like Primordial Jade Cutter or The Black Sword to maximize Ayato’s normal attack scaling during his Shunsuiken skill.
- Ayato excels in multiple team compositions including freeze teams with Kokomi and Shenhe, vaporize teams with Bennett and Kazuha, and electro-charge teams with Fischl—making him adaptable to any Abyss cycle.
- Focus talent investments on Normal Attacks first, followed by Elemental Skill, with Elemental Burst as lowest priority; reaching Character Level 80/90 before pushing talents to maximum levels ensures efficient resource usage.
- Master advanced combat rotations by maintaining consistent Shunsuiken uptime, weaving ability casts during the 3-second cooldown window, and adapting positioning based on enemy types—from freeze-locked single targets to spread-out multi-enemy scenarios.
Who Is Ayato and Why He Matters
Ayato is the Yashiro Commission’s polished water swordsman and a core member of Genshin Impact’s hydro roster. Released in Version 2.6, he’s remained relevant through multiple meta shifts thanks to his consistent damage output and flexible team-building options. What sets him apart is his on-field hydro application and his ability to function as a main DPS without demanding exotic support characters.
His kit scales heavily on attack power and crit stats, making him straightforward to build once you understand the fundamentals. Unlike reaction-dependent hydro units like Xingqiu or Yelan, Ayato generates his own damage window and doesn’t rely solely on chain reactions to be effective. This independence means he works in scenarios where other hydro DPS would struggle.
In the context of 2026’s meta, Ayato remains competitive against newer hydro carries. The arrival of alternative hydro DPS hasn’t displaced him because his energy requirements are reasonable, his damage ceiling stays high with proper investment, and his support pool has only expanded. If you’ve been sleeping on this character, now’s the time to build him, especially if you lack dedicated hydro DPS for Abyss cycles favoring elemental variety.
Ayato’s Abilities and Mechanics Explained
Passive Talents and Their Impact
Ayato’s passive kit is designed to reward aggressive playstyle and proper artifact stacking. His first passive, Kyoka Kasuumi, boosts his normal attack damage based on his attack stat, specifically, every 100 ATK adds a flat damage bonus to his normal and charged attacks. This creates a scaling incentive to prioritize ATK over other stats when building, though crit stats remain critical for consistent output.
His second passive, Nameless Blessing, applies a stacking buff whenever he uses his elemental skill or burst. These stacks increase his normal attack damage further, creating a snowball effect during extended rotations. The stacks persist for 30 seconds and reset each time you recast the ability, meaning active gameplay rewards maintaining high uptime on his damage window.
The exploration passive, Kokomi’s Teachings, reduces the cooking time for attack-boosting dishes by 25%, useful for spiral Abyss sprints but not game-changing for your build strategy.
Elemental Skill and Burst Damage Output
Ayato’s elemental skill, Shunsuiken, is his primary damage tool. When activated, he enters a stance where his normal attacks gain hydro infusion and increased range. These enhanced attacks apply the Nameless Blessing stacks mentioned earlier, ramping his damage throughout the duration.
The skill has a relatively short cooldown of 9 seconds and restores energy on hit, meaning consistent uptime is achievable even without heavy energy investment. Most players maintain around 120-130% energy recharge on Ayato, which feels smooth during rotations without feeling like wasted stats.
His elemental burst, Suiyuu, deals solid hydro AoE damage and applies Nameless Blessing stacks. The burst isn’t a primary damage source, it’s more about energy cycling and maintaining offensive buffs. Unlike some DPS units, you won’t feel crippled if you miss a burst window.
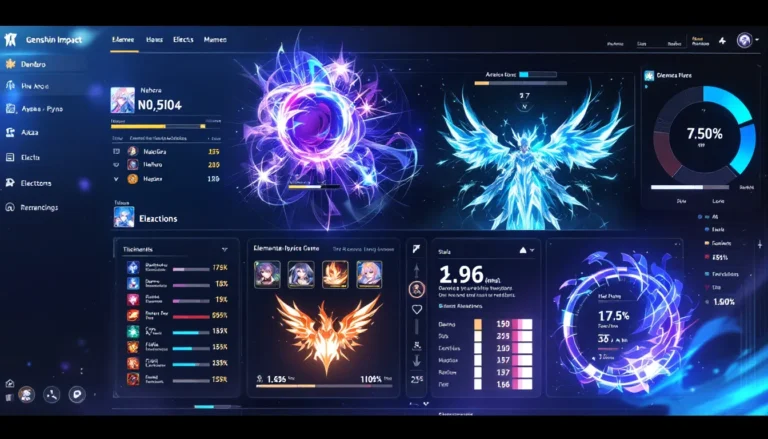
Damage-wise, expect around 15,000-25,000 per normal attack hit during Shunsuiken with mid-tier artifacts and level 8 talents, scaling to 30,000+ with artifact optimization and higher talent levels. These numbers scale linearly with ATK investment and crit rate/damage multipliers.
Best Builds for Maximum Damage
Optimal Artifacts and Stats
Artifact Set Recommendations:
- Echoes of an Offering (4-piece): Best-in-slot for main DPS Ayato. The 4-piece bonus triggers on normal attacks, aligning perfectly with his Shunsuiken playstyle. Expect 20-30% damage increase over other sets with proper stat distribution.
- Heart of Depth (4-piece): Strong alternative if you lack Echoes pieces or prefer the farming route. Provides solid hydro damage bonus and normal attack speed buff.
- Noblesse Oblige (2-piece) + Hydro Damage Bonus (2-piece): Budget option if farming domains feels inefficient. Provides decent damage floor without perfect substats.
Target Stat Priorities:
- ATK: 2,000+ ATK is comfortable. Every point scales Ayato’s damage directly. Prioritize ATK over everything except crit until you hit this threshold.
- Crit Rate: 60-75% depending on weapon choice and team buffs. Ayato without crit feels gutted.
- Crit Damage: 120-150% baseline. After hitting crit rate targets, dump remaining rolls into CDAM.
- Hydro Damage Bonus: 20-35% depending on artifact set. Nice to have but lower priority than crit.
- Energy Recharge: 120-130% feels optimal. Below 110% creates rotation awkwardness: above 140% wastes precious stat allocation.
Artifact Mainstats Breakdown:
- Sands: ATK% (non-negotiable)
- Goblet: Hydro Damage Bonus (unless ATK rolls are significantly worse)
- Circlet: Crit Rate or Crit Damage depending on your current ratio
Weapon Recommendations for Every Playstyle
5-Star Weapons (Best to Good):
- Primordial Jade Cutter: Universally best option. The ATK scaling and crit rate substat align perfectly with Ayato’s needs. Seamless fit into any team.
- Haran Geppaku Futsu: Dedicated hydro sword designed for hydro DPS like Ayato. Provides significant hydro damage bonus and normal attack bonus. Slightly edges out Cutter in pure damage but Cutter’s flexibility wins for versatility.
- Skyward Blade: Works if you need energy recharge. The ATK% and energy recharge help with rotation smoothness, but you’re trading pure damage for comfort.
4-Star Weapons (Accessible and Effective):
- The Black Sword: Best 4-star option for most players. Provides crit rate, ATK%, and healing, quality-of-life for survivability. Requires Battlepass.
- Amenoma Kageuchi: Free gacha option with decent ATK and energy recharge. Statistically weaker than Black Sword but accessible to everyone.
- Iron Sting: Elemental mastery substat feels wasted, but ATK% is solid. Budget option if you lack alternatives.
Weapon-Specific Playstyle Notes:
With Primordial Jade Cutter, you can afford to run lower ATK substats and maximize crit stats. With Black Sword, you might run more ATK% on artifacts to compensate for the lower weapon base ATK. The choice shapes your exact artifact stat distribution but doesn’t fundamentally change rotations or team requirements.
Team Compositions and Synergies
Elemental Reaction Teams
Freeze Team (Ayato + Cryo DPS/Sub-DPS + Hydro Battery + Flex):
Freeze teams leverage Ayato’s consistent hydro application to lock enemies in place while dealing steady damage. Pair him with Shenhe, Kokomi, and a flexible cryo sub-DPS like Rosaria or Ayaka. The freeze duration extends Ayato’s on-field time, letting him maximize his elemental skill rotation.
Example: Ayato + Shenhe + Kokomi + Ayaka. Rotation: Kokomi E → Ayaka combo → Ayato E (holds) → Ayaka finish → repeat. Kokomi provides both healing and hydro application, while Shenhe buffs cryo damage for Ayaka’s burst.
Vaporize Team (Ayato + Pyro DPS/Sub-DPS + Hydro Battery + Flex):
Vaporize amplifies Ayato’s hydro damage through pyro reactions, pushing his damage ceiling higher. Pair with Bennett for ATK buffing and hydro application, Kazuha for both damage and element bonus, and a secondary pyro source like Xiangling. Actually, stick with Bennett as primary pyro applicator since vaporize chains require precise timing.
Example: Ayato + Bennett + Kazuha + Xiangling. This composition maximizes ATK buffing and pyro application for consistent vaporize reactions.
Electro-Charge Team (Ayato + Electro Sub-DPS + Hydro Battery + Flex):
Electro-charge scales with hydro and electro application rates. Pair Ayato with Fischl (off-field electro DPS) or Beidou for consistent electro reactions. For pure electro-charge, use Fischl + Kazuha or Fischl + Bennett. Ayato’s hydro application triggers Fischl’s off-field lightning constantly.
Example: Ayato + Fischl + Kazuha + Bennett. Fischl provides off-field electro, Kazuha buffs both hydro and electro while providing elemental damage, Bennett heals and applies ATK buff.
Support and Sub-DPS Combinations
Premium Support Tier:
- Kazuha: Elemental damage bonus + elemental mastery sharing = top pick. Boosts both your and Ayato’s damage simultaneously.
- Nahida: Elemental mastery and off-field dendro application enable bloom reactions if you’re running dendro applicators alongside Ayato. Less direct synergy than Kazuha but enables creative team builds.
- Yelan: Hydro applicator and off-field sub-DPS. Her damage buff passive scales with max HP, making her amazing for characters like Hu Tao but decent for Ayato (he doesn’t scale HP). Still solid for raw damage multiplier.
Solid Support Tier:
- Bennett: ATK buffing is never wasted on a physical/hydro DPS. Energy recharge helps rotations. Pyro application can complicate reaction chains in freeze comps but simplifies rotation in vaporize attempts.
- Fischl: Off-field electro applicator with the highest single-target DPS. Transforms Ayato’s hydro into electro-charge chains.
- Xingqiu: Budget hydro battery before you upgrade to Yelan. Still viable for energy cycling without sacrificing team slots.
Example Full Team Compositions:
- Freeze Control: Ayato + Shenhe + Kokomi + Rosaria
- Strength: 100% freeze uptime, Shenhe buff stacking
- Weakness: Limited single-target burst damage
- Damage Ceiling: Ayato + Kazuha + Bennett + Yelan
- Strength: Maximum ATK and elemental damage multipliers
- Weakness: No healer: requires dodging or shield support
- Beginner-Friendly: Ayato + Fischl + Kazuha + Barbara (or Kokomi)
- Strength: Accessible 4-stars, smooth rotations, healing included
- Weakness: Lower damage ceiling than premium comps
Leveling and Talent Prioritization
Material Farming Guide
Talent Priority Order:
- Normal Attacks: Max this first. Ayato’s entire damage comes from normal attacks during Shunsuiken, so every talent level directly scales his sustained DPS. Aim for level 8-9 before pushing further.
- Elemental Skill: Second priority. Increases Shunsuiken duration, damage multiplier, and duration extension. Level 8 feels comfortable: level 9+ is luxury.
- Elemental Burst: Lowest priority. His burst does supplementary damage and cycles energy, but missing a burst window doesn’t cripple rotations. Level 6-8 is sufficient for most players.
Character Level Progression:
Leveling Ayato to 90/90 is worthwhile since his ATK scaling benefits from base ATK increases. The jump from 80/90 to 90/90 costs significant resin but adds roughly 5-8% to your damage ceiling. If you’re resource-constrained, 80/90 is perfectly viable for Abyss.
Required Materials Breakdown:
- Hydro Hypostasis Shards: Domain farming required. Expect 2-3 runs per talent upgrade (10-15 shards per run, 5 shards required per upgrade). This is your primary bottleneck.
- Guide to Transience (talent materials from Narukami Island): Farmable from Violet Court Domain (Tuesdays/Fridays/Sundays). 3 runs nets enough for one full talent upgrade on both skills.
- Crowns of Insight: Use conservatively. Reserve these for talents you actually play frequently. For Ayato, normal attack crown is most impactful.
- Orirock Splinters/Chunks: Farmable from general leylines or dropped by enemies. Expect 1,000+ total fragments needed for full leveling.
Ascension Priority:
- Prioritize ascending to Level 80/90 before dumping resin into talent levels 8-10. The character level unlock is a massive damage jump.
- After hitting level 80, distribute remaining resin between talent upgrades and other character investments. There’s no reason to max Ayato before building team supports.
Efficient Farming Route:
- Farm Hydro Hypostasis weekly for shards (costs 40 resin).
- Run Violet Court Domain on talent material days (costs 20 resin per run: aim for 3-4 runs).
- Supplement with leyline outcrop farming for Orirock while working on other domains.
- This nets roughly one talent upgrade per week while balancing other account progress.
Artifact Farming Efficiency:
Unlike talents, there’s no weekly lockout on artifact domains. Run Echoes of an Offering / Blizzard Strayer domain (currently the meta artifact domain) for 15-20 minutes daily. You’ll accumulate enough usable pieces for multiple characters while hunting Ayato’s perfect set. Most players spend 3-6 months building competitive Ayato artifacts due to RNG, so start early.
Advanced Combat Strategies
Rotations and Playstyle Tips
Standard Rotation for Freeze Teams:
- Support Setup: Kokomi E (applies hydro) → Rosaria E (applies cryo, extends freeze duration).
- Ayato Damage Window: Tap elemental skill to activate Shunsuiken, hold for 4-5 seconds (optimal duration before energy tick wastes stacks), perform 4-5 normal attacks per hold cycle.
- Rotation Extension: If enemies still alive, use Ayato’s elemental burst (builds energy for next rotation), then immediately re-activate Shunsuiken again.
- Repeat: Cycle through supports on cooldown while maximizing Ayato’s on-field time.
Timing Optimization:
Ayato’s Shunsuiken has a 9-second cooldown and 6-second duration. This means there’s a 3-second window where he’s not in the enhanced attack stance. Use this window for support abilities or positioning, not idle time. Land your support abilities just before Ayato’s skill ends so cooldowns refresh as he reactivates.
Energy Rotation Management:
With 120-130% energy recharge, Ayato regenerates his 80-energy burst roughly every 3-4 skill activations (9 seconds between reactivations). Don’t panic if you miss a burst window, his skill damage is so consistent that skipping one burst only costs 1-2 seconds of DPS. Conversely, don’t force burst rotations early just because the bar is full: use it to synchronize with support cooldowns.
Positioning and Spacing:
Ayato’s skill gives him melee range, so stay close to enemies. His normal attacks have short range, unlike some characters. Against spread-out enemies (like the Abyss Herald), position so your AoE normal attacks clip multiple targets. During freeze rotations, the freeze itself pins enemies in place, so positioning is less critical than in non-freeze scenarios.
Ability Weaving:
Cancel normal attack animations by jumping or dashing immediately after the attack connects. This doesn’t increase DPS directly but reduces downtime between rotations. Skilled players weave dashes between every 2-3 hits, maintaining constant uptime without sacrificing safety.
Damage Window Extension vs. Cooldown Syncing:
Holding Shunsuiken for the full 6-second duration guarantees you don’t waste the cooldown (by reactivating too early and overlapping its tail end). But, if enemies are dying or low HP, releasing early to swap to your burst lets you transition to the next phase faster. There’s no mathematically correct answer, context matters.
Against High-HP Bosses (E.g., Spiral Abyss 12):
Maximize your rotation efficiency by running a battery character like Fischl or Xingqiu to ensure burst uptime every cycle. Pair Ayato with Kazuha to amplify his damage and reduce time-to-kill. Run this composition:
Ayato + Kazuha + Fischl + Bennett
- Fischl E (sets up off-field electro)
- Kazuha E (triggers electro-charge, applies elemental damage buff)
- Bennett Q (applies ATK buff)
- Ayato E+Normal attacks (6-second window)
- Ayato Q
- Ayato E again (reactivate immediately after burst)
Repeat this cycle. With proper execution, you’re dealing upwards of 200K-300K DPS (accounting for off-field Fischl damage) on single enemies.
Against Multiple Weak Enemies:
Switch to cleave-oriented teams with AoE sub-DPS. Example:
Ayato + Kazuha + Yelan + Bennett
The AoE normal attacks during Shunsuiken and Kazuha’s AoE damage make this composition excel at clearing packs. Less single-target focus, but much faster clear speed for mobs.
Gauntlet Strategy Tips:
In Spiral Abyss chambers with multiple enemy types, Ayato’s flexibility lets you adjust supports per chamber. Bring freeze components if the chamber is all hydro enemies (freeze chains unaffected), switch to vaporize or electro-charge if you’re facing enemies weak to those reactions. Check the enemy lineups before entering and optimize accordingly.
Comparison With Other Hydro DPS Characters
Ayato doesn’t exist in a vacuum, the hydro DPS roster has expanded significantly, and you should understand how he compares to alternatives before committing resources.
Ayato vs. Neuvillette:
Neuvillette is the newer hydro carry with significantly higher damage scaling and passive healing. His scaling factors are larger, his energy requirements more forgiving, and his survivability inherent to his kit. But, Neuvillette requires Zhongli for comfort and doesn’t function well without premium supports. Ayato is more accessible, he functions fine with 4-star supports and budget teams. If you have Neuvillette, building Ayato as a secondary hydro DPS for multi-target Abyss is reasonable. If you don’t have Neuvillette and can’t guarantee his rerun, Ayato is a safer investment for consistent output.
Ayato vs. Hu Tao:
They’re fundamentally different playstyles. Hu Tao is a pyro vaporize carry with higher single-target burst but lower sustained DPS. She’s clunky below 50% health and requires precise rotations. Ayato offers smoother, more consistent damage without gear checks. Hu Tao wins on pure damage ceiling against single targets, but Ayato’s AoE normal attacks make him better for multi-enemy scenarios. If you already have Hu Tao, Ayato serves as a hydro alternative. If you have neither, Ayato is the safer pick for variety and flexibility.
Ayato vs. Xingqiu and Yelan:
These are off-field hydro applicators, not main DPS. Comparing them directly is misleading. That said, Xingqiu and Yelan enable reaction-based comps (like Hu Tao vaporize, Alhaitham bloom), while Ayato is the on-field driver. Build Xingqiu/Yelan as supports alongside Ayato if you’re running reaction teams. They’re not replacements: they’re supplements.
Ayato vs. Kokomi:
Kokomi is primarily a healer with off-field hydro application. She can function as a sub-DPS but lacks the on-field damage of a true carry. If you need a healer for freeze teams, Kokomi synergizes beautifully with Ayato (see the freeze team composition in the Team Compositions section). If you already have Kokomi built, pairing her with Ayato is a no-brainer. If you don’t have her, building Ayato first and using Barbara temporarily is viable.
Ayato vs. Fischl (Electro-Charge Enabler):
Wait, Fischl isn’t hydro. But electro-charge comps featuring Ayato rival freeze in popularity. If you’re considering an electro-charge team featuring Ayato, Fischl triggers the reactions off-field, meaning Ayato’s on-field presence drives the damage without needing a dedicated hydro battery. This is different from vaporize, where you need Yelan or Xingqiu to amplify reactions. Fischl-enabled electro-charge is arguably Ayato’s best team configuration in current meta.
Meta Context for 2026:
Ayato remains in the high-tier category for hydro DPS. His consistency and flexibility haven’t been power-crept even though newer releases. Build him if:
- You lack any hydro main DPS.
- You want an accessible alternative to Neuvillette.
- You want to run multiple element teams in Spiral Abyss without duplication.
Don’t prioritize Ayato if:
- You already have Neuvillette or other top-tier hydro carries built.
- You can’t spare the resin to properly invest in him (this is a resource game, prioritize your strongest teams first).
Resource Allocation Recommendation:
If you’re a mid-game player deciding between multiple characters, evaluate based on your current roster. Ayato consistently ranks in the top 10-15 hydro options, which speaks to his staying power. Build him if you enjoy his playstyle, that matters more than pure damage numbers once you’re past early game.
Conclusion
Ayato is a complete hydro carry that rewards investment with consistent, flexible damage output. His kit is straightforward to understand but deep enough to optimize for experienced players. Unlike some characters that require perfect supports or specific reactions to function, Ayato performs across multiple team archetypes, freeze, electro-charge, or pure ATK-scaling strategies all work.
Starting from scratch? Build him with the essential strategies guide as your foundation. Already competitive? Refer to the advanced rotations and comparison section to contextualize where Ayato fits in your account’s progression. No matter your level, the investment pays dividends for Abyss cycles, world farming, and just enjoying Teyvat with a character that plays smoothly.
The meta will shift, new hydro carries will launch, but Ayato’s foundation is solid enough to remain relevant. Get him leveled, farm those Echoes artifacts, and start optimizing your rotations. You’ll see the damage improvements immediately.